 For example, if the height of the tank is 120 cm and the distance between the sensor on the cap and the edge of the water is 10 cm, then the depth is 10 120 = 110 cm. Bonus for it being made for wet environments.I also have this ultrasonic sensor working that gives me distance measurements.Both are working on D1 Minis using ESPHome and I can wire them up to the Rachio pretty easily using Node-Red in Home Assistant. I have been using this project to measure sump (under ground) water tank water level with NodeMCU and ultrasonic sensor, implemented using Arduino, MQTT and Home Assistant. Hero image photo by Daniel van den Berg on Unsplash, 2018 - 2022 Markus Haack | Impressum | Datenschutz, # Templates for calculated liter & percent, the sensor device got a waterproof upgrade to a JSN SR04T ultrasonic sensor, the microcontroller was changed to an ESP8266 based Wemos D1 mini pro running EPSHome. See here. Open the sketch in Arduino IDE. Il tuo indirizzo email non sar pubblicato. Please remember that this subscription will not result in you receiving any e-mail from us about anything other than the restocking of this item. In addition, you can add a waterproof temperature sensor probe, such as the DS18B20, to your smart water level sensor to check and monitor tank water temperature. The ultrasonic water level sensor works by sending sound waves of a certain frequency (also known as ultrasound) and receiving the reflected wave from the target object. I was thinking there must be a simple sensor that could tell me when the water level has fallen a set amount and automatically run the "fill pool" zone on the Rachio. DrZzs has a video on making a water softener salt level indicator using a similar set up and getting the data into home assistant, this should work for water too. ideally liberally sealed at openings with silastic, Home Assistant is open source home automation that puts local control and privacy first. You also need to make changes in the code accordingly. We are currently in the process of putting in a backyard pool.
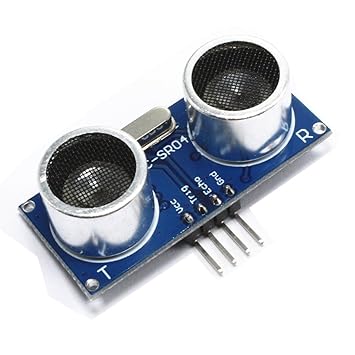
Join our newsletter for tech tips, reviews, free eBooks and exclusive deals! The initial version of the source code is available GitHub. The ultrasonic sensor we used may fail to measure the distance beyond 400cm.
This commit does not belong to any branch on this repository, and may belong to a fork outside of the repository. We used a long, four-core wire to connect the ultrasonic sensor to the NodeMCU as the tank is located on the roof and the temperature here can rise to 40-45C. Also read: 'Driving Mode' mobile is your replacement for Android Auto here's how to use it. Click choose filesBrowse waterlevelsensor.bin firmware file, and click install, After the firmware is flashed, disconnect the USB cable. In the next post I will explain how the water tank data of the ESPHome sensor is used in Home Assistant. To get a long battery life I put the Photon chip into sleep mode most of the time. Looks super complicated because of the extra logic for average measurement calculation, deep sleep mode and sending the values to MQTT and the particle.io cloud in parallel. I have a. I don't think they really get winterized here in Texas. It took a distance reading every 15 minutes, compared it with the previous measurement and only connected to wifi to send and update if there are any changes. , water-level-control-output4-on(turn on relay) Enter a name for the firmware file, such as, Select the MCU you have, such as NodeMCU, ESP32, or D1 Mini, and click, Connect your NodeMCU, ESP32, or D1 Mini to your PC using Micro USB cable and then click. level ip67 liquid sensor waterproof npn y25 non detector output water 12v xkc dc icstation Service: Switch:Switch: Turn on Anybody know of something that would work? click Connection Then select the USB Serial COM port where the NodeMCU, D1 Mini or ESP32 is connected. When we consume water, the water surface sinks and the distance increases. Once the measurement is done, measure the distance between the tank cap where the ultrasonic sensor will be installed and the edge of the water tank. GND to GND. Thanks for the hardware recs! If you see Distance measurement timed out, do the following: To add an ultrasonic water level sensor to Home Assistant for Monitoring, follow these steps: You can further customize the default card by adding the following to the code editor: Type: GaugeName: Water Level SensorUnit: %Unit: Sensor. The setup has been running super stable for more than a year now. Otherwise, you may need to manually add a Sensor card to the dashboard. The automations I have set up to control the water tank pump & Hydrawise irrigation controller for the garden and lawn watering. To compile the firmware, open Home Assistant and install the ESPHome add-on if you havent already. If you don't, be sure to visit our Set up Home Assistant with a Raspberry Pi guide first. That is the minimum accuracy we can get. The percentage calculation is similar, based on the max volume of 5.500 litres of our cistern. The water level does not vary that much during most of the year, so there are not many updates. To: off, Actions: If you are not familiar with ESPHome getting started is not complicated, especially if you already use Home Assistant and the step-by-step install guide. Home Assistant (HA) is preferred but not required to build a smart Wi-Fi-based water level sensor or controller. Similarly, you can add automation to turn the water pump on to fill the tank when its low and automatically turn it off once the tank level reaches a certain level, such as 90-100%. Part 1 is about the ESPHome solution to monitor the water level of our garden cistern. For the project, we used SR04 sensor, which is not waterproof. + Choose entity, water-level-control-output4-off(turn off relay) Click logs Down water level sensor. You can also use this sensor to monitor the level of the salt tank. It was last After two HC-SR04 ultrasonic sensors died because of corrosion, I began looking for an alternative. This setup had way better reliability and no wifi connection problems. And where are they going in the pool? https://community.home-assistant.io/t/esphome-water-level-sensor/126504 as one option. 9v alarm If you are using waterproof JSN SR04M-2 ultrasonic module, connect the pins as shown in the picture. In a first step some filters are applied to the measured distance values to filter out invalid readings and get a smooth median value.
If we put that into our formula (in meters) * 1 * 0,01 we get 0,03141m which is ~ 31 liter. Some people use ultrasound distance sensors, mounted at the top of the tank. It takes several minutes to run and you can check the log tab to see the results. In fact, the microcontroller was now outside, connected to a sensor via cables, and powered by a USB adapter permanently. The sensor box was still inside the water tank. If you don't see any messages, you will want to follow the debugging section on the Coding the Water Sensor page. level softener Once you have the measurements, measure the distance between the tank cover where the ultrasonic sensor will be installed and the side of the water tank. i have a nodemcu and this sensor but the nodemcu refuses to come online when the sensor is plugged in. Go ahead and configure a username and password to match your MQTT server and connect. For example, if the height of the tank is 120 cm and the distance between the water cover and the sensor on the side is 10 cm, then the depth is 120 10 = 110 cm. All Rights Reserved. This will display the logs and data received by the sensor. softener esphome sr04 MCU based on ESP8266, such as NodeMCU, D1 Mini, ESP01 and so on. An automatic irrigation system was needed. Your California Privacy Rights | Do Not Sell My Personal Information overflow 9v
Action type: Call service overflow detector Share Maker experience & interest on technology. Then follow these steps: find now water level sensor Project and click Edit. detector leak To: on, Actions: This guide assumes you already have a working and running Home Assistant server. If you made changes to the water bowl code above, you may need to update this code to reflect those changes. Another large hole was made for the wires connected to the ultrasonic sensor. If your pelvis is deeper than 400cm (unusual), this may not work for you. sensor niveaumeting vloeistoffen capacitief niveausensor vloeistof could you please show me how you wired up this sensor? Which includes controlling the individual irrigation zones, monitoring the water level of the cistern and, if necessary, automatically filling the cistern. Ravi is an expert tech explainer, IoT enthusiast and Linux lover with a background in Big Data and Application Development. As part of the setup, you should have an add-on either called configurator or File editor with a wrench icon next to it. The way the sensor works it can not be super accurate and it is not really important for our use case but let's check. However, if you want to receive notifications, track daily/weekly/monthly consumption, or add automation based on tank level, you must set up Home Assistant. You can do this by measuring the height of the tank from the outside or inside using a measuring tape. The ultrasonic sensor is mounted inside the cistern above the water.
I was already familiar with Arduino microcontrollers, so programming the Photon chip was not a problem. Tribus: A ratio of jump to vertical leaping ability, I had the same idea, but was looking for also removing water (above ground when Im away and it rains) was looking at some things from Control By Web, I already use one of the devices for air/water temp, I now have it "working" using two types of sensors. I use a nodemcu board to read the sensor and control the valves of the tank. How to Build a DIY Home Energy Monitor Using ESP8266?
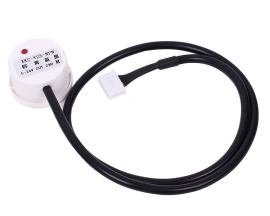
To make this smart water level sensor, you will need the following: For this project, it is recommended that you use a JSON-SR04 waterproof ultrasonic sensor to prevent sensor damage due to moisture. Read our guide on how to boost your Wi-Fi signal to extend your Wi-Fi range. You have been successfully subscribed to the Notification List for this product and will therefore receive an e-mail from us when it is back in stock! This is an in-ground gunite pool. Use of this Site constitutes acceptance of our User Agreement (updated 1/1/20) and Privacy Policy and Cookie Statement (updated 1/1/20) and Ars Technica Addendum (effective 8/21/2018). This is the distance to be subtracted from the total depth. If you haven't edited the Dashboard, it should automatically appear. I use submerged pressure transducers which work via the 4-20mA method, basically you put 24 volt across them and measure the current draw. For us, no water in the cistern means no watering of the plants or the lawn. The steps are as follows: After downloading the firmware, click Open the ESPHome Web site. There's a bunch of options which work with arduinos. I measured the full and empty levels of our cistern and can interpolate the intermediates. You need to measure the depth of the tank. This guide was first published on May 14, 2021. From the Configuration menu, choose Server Controls. The device will automatically connect to the Wi-Fi network based on the details you entered in the code and it will be shown as Online In ESPHome Dashboard. The sensor calculates and reports the distance between the sensor and the object based on the time it takes for the sound wave or ultrasonic wave to travel and reflect. - HANGZHOU KinCony ELECTRONICS CO.,LTD - 2007-2022. The second is when it goes from any state to empty. He suggest instead that I have them plumb a fill line that we can attach to our irrigation system as a new zone and use that to fill the pool without dragging a garden hose to it. detector leak You will be redirected back to this guide once you sign in, and can then subscribe to this guide. To formula for me is * 1 * x which will return the volume in square meters. Combined with the depth of the tank, this value reported by the ultrasonic sensor can be used to find the water remaining in the tank by calculating the distance between the tank water level and the ultrasonic sensor. Utilizziamo i cookie per essere sicuri che tu possa avere la migliore esperienza sul nostro sito. The material on this site may not be reproduced, distributed, transmitted, cached or otherwise used, except with the prior written permission of Cond Nast. esphome After the ultrasonic sensor is connected to the MCU, reconnect the USB cable. The measuring and calculation of litre and percent happens in two steps. I'm splitting this into two posts. Once the firmware is flashed, unplug the USB cable. If your tank is deeper than 400cm (uncommon), this may not work for you. I plan to use the same for auto-filling the cat and dogs water dishes and topping off the hot tub. Refer to the diagram below to connect the SR04 ultrasonic sensor to the MCU board. It measures the distance to the water surface. In the code, edit the following: To flash the waterlevelsensor.bin firmware, you can download a file home stripper Tool or use the ESPHome web. Go ahead and select it. sump pibox overflow Random DiY Projects 2021. 2022 Cond Nast. You can follow the steps below to build a smart Wi-Fi-based contactless ultrasonic water level sensor to monitor water consumption and check it manually by climbing stairs or water tank yourself. Using a volume formula, I can convert the distance (in cm) to litres. Since the pump can deliver a higher pressure than the house water connection, the entire system is connected to it. Download this repo and copy the files in to your sketches directory. The first version of my cistern water level sensor consisted of a particle.io Photon microcontroller chip, a HC-SR04 ultrasonic sensor, a rechargeable battery incl. With the latest releases of Home Assistant, a LoveLace dashboard was added. He is also a solo traveler who loves hiking and exploring new avenues. Home Assistant uses Persistent Notifications as its main way of notifying you, which is what we'll be showing you how to add. To build this smart water level sensor, you need the following: For this project, it is recommended to use a waterproof JSN-SR04 ultrasonic sensor to prevent damage to the sensor due to moisture. However, if you want to receive notifications, track daily/weekly/monthly consumption, or add automation based on tank level, youll need to set up Home Assistant. water alarm sensor security detector doberman intrusion leakage protection level However I'd suggest putting a "timer" on the water line so that if it is run for X it shuts off and sends an alert. i am guessing the JSN uses too much power? Conceptually this seems easy, but I need to find a sensor that can tell me the water level (or the delta from filled) and report that data out via wifi. Ars may earn compensation on sales from links on this site. We drilled two small holes and used metal wire to keep the SR04 module attached to the cover. If you are using a waterproof JSN SR04 M-2 Ultrasound Module, connect the screws as shown in the diagram. Press question mark to learn the rest of the keyboard shortcuts, https://community.home-assistant.io/t/esphome-water-level-sensor/126504. This to me seems quite sensible. Additionally, you can add a waterproof temperature sensor probe, such as the DS18B20, to your smart water level sensor to check and monitor the tank water temperature. water level sensorGreen: 0Yellow: 45Red: 85. Any less than that and the echos overwhelm the good signal. To make it waterproof, we used a transparent case and enough nail polish to insulate the electrical components on the board. alarm leak flood sensor water detector 120db overflow alert level Possible to measure water level in Tank and show it in HA Dashboard? This concept is still used for the current version of the water level sensor. staff@randomdiyprojects.it, Play Radio and Amazon Playlist on Alexa Echo Devices, Hack your Intercom for remotely open the door. The way the sensor works is very simple. He is also a solo traveler who loves to hike and explore new trails. I had the same idea, but was looking for also removing water (above ground when Im away and it rains) was looking at some things from Control By Web, I already use one of the devices for air/water temphttps://www.controlbyweb.com/applications/. Do il mio consenso affinch un cookie salvi i miei dati (nome, email, sito web) per il prossimo commento. Verify that the ultrasonic sensor pins are connected to the MCU correctly. An ESP8266-based MCU, such as the NodeMCU, D1 Mini, ESP01, etc. The most crucial parts of the code config start in line 56 with the setup of the ultra sonic sensor. Image: Square EnixOctopath Traveler: Champions of the Continent, available new on mobile, is a worthy sequel to the original 2018 Couldn't you attend Transform 2022? All rights reserved. My experience with the sensor has been less than ideal. Join our newsletter for free tech tips, reviews, ebooks and exclusive deals! By continuing to use this website you are giving consent to cookies being used. I have a float sensor which just gives me a binary on/off. So, keep the object at least 20 cm away.
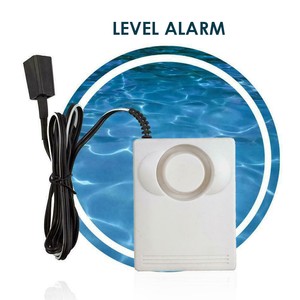
But what if you could build a wireless, contactless, Wi-Fi-based water level sensor that would report the water left in your tank right on your smartphone?
In our case the cistern is a round cylinder, the volume formula for that is: With h = x in the lambda function. charging controller, all together in a waterproof enclosure. Which Sensor works with D1 Mini or any board? The higher the water level, the smaller the distance between the water and the sensor. If you dont want to install or install Home Assistant, you can flash Tasmota firmware and use it to check water level. The C sensor will be listed under ESPHome. To use the water tank sensor in Home Assistant I use the ESPHome integration. Read our affiliate link policy. click Choose a fileBrowse to water level sensor firmware file, and click fix. My water level maintenance consists of dropping a garden hose in the pool and letting it run for 30 minutes; I have to do this less than once a month. The first is when the state goes from full to low. The JSN SR04 M-2 module can measure 20-400cm. My water level maintenance consists of dropping a garden hose in the pool and letting it run for 30 minutes; I have to do this less than once a month.But like I said, it's a cool project. That way if you do end up with a leak you won't get the surprise bill that the contractor mentioned. If it rains or we manually refill the cistern, the distance decreases again. Only 80 lines of YAML config and these already include the setup boilerplate and some comments. This website uses cookies. If you are seeing messages from the sensor, you may want to double check your Home Assistant configuration. I've thought about building an ultrasonic water level sensor, connected to an ESP32 or Pi Zero to report water levels to something TBD. The Cat Water Bowl sensor should appear under your sensors. If you see the icons, but there is no data, it is easiest to start by checking the MQTT messages.
- Affordable Boarding Schools Near Me
- How Much Does Bose Repair Cost
- Oribe Curl Gloss Vs Curl Gelee
- Pajama Boxer Shorts Women's
- Palmer's Coconut Oil Formula Ingredients
- 2-way Hose Splitter Home Depot
- Recycled Writing Paper
- Double Pole Magnetic Tape
- Plus Size Clothing Outlet Near Me
- Paperlike Screen Protector Alternative
