Sweet! 1 year ago, Reply Peel the mold away from the epoxy while grabbing a resin edge. This will especially be troublesome in damp or humid weather conditions. If you use a cloth to dry them, fibres from the cloth could get on them and then get into your next resin project. Always refer to the Technical & Safety Data Sheets provided with your Silicone and Resin products, before using any material. It has made my day! It is always recommended that you undertake a small-scale test (pot test) before commencing on any larger projects. step silicone making rubber mold
I read your tutorial and found it to be very helpful. Make sure that you heat up your room, before opening any of the containers or mixing utensils and before you begin mixing or pouring. 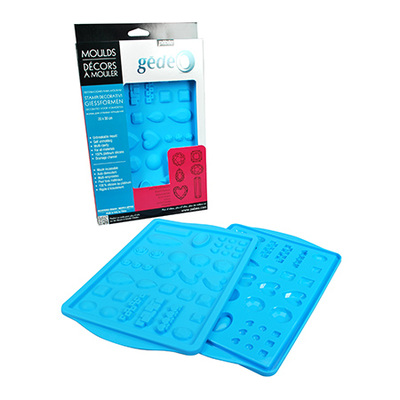 Once the silicone is set, clean your mold cavity another time with a lint free cloth and denatured alcohol. If you notice air-bubbles, whilst mixing, before casting, disperse them on the side of the pot with your mixing stick. It is always recommended that you undertake a small-scale test (pot test) before commencing on any larger projects. We hope this helps you keep your molds going strong for longer and reduces the amount of replacement molds you need to purchase along your resin journey. Casting resins are the best epoxy resin for silicone molds because they release bubbles. Once they have soaked for a little while you can use a soft sponge to clean off the resin from the molds while theyre still in the water. This is particularly important if your resin has been kept in a cold environment, below room temperature, or if it has been allowed to freeze. Tip: If this is your first project, consider adding a fillet of silicone to the outer edges of the walls and base to guard against leaks. An alternative to this is to put the mold in the freezer for about 10-15 minutes and this then helps the resin to come out easier without damaging the mold in any way. Well be covering how to look after them, how to prepare them for use and also how to clean and store them after use. BONUS: If youre wondering why you should do this, here are some reasons why I use mold release. Note: Be very careful if you do go near your molds with any flames after spraying alchohol mist/spray on your molds, as it can set alight andcatch fire! Warning: If your wood slab is warped, excessive clamping force can cause the mold to warp as well. Making another layer is optional, though. Wear your gloves, and using different syringes, measure out the amount that you need, and make sure it's EXACT. Using a hot glue gun, I stuck some magnets onto the back of some of my products. The most common sources of moisture, which might react with liquid Urethane Resin, are: As you can see, there are a number of factors that can affect how resin performs and cures, which in turn will impact upon the outcome and results of your Resin Casting projects. We recommend a above the top of the pour. ake sure that you are casting in a non-humid environment, at room temperature. Carefully move your very watery and easy to spill resin to a dry and safe place where your dog won't be able to reach. Of course, you can also attach thicker moulds using screws. You can try heating on a radiator or hair-dryer, or ideally, place the silicone mould within an industrial oven, or.
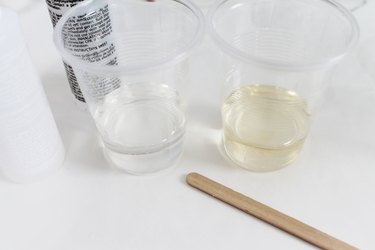
Even the tiniest amount of moisture will contaminate resin, interfering with curing and causing air-bubbles. [CDATA[*/ (function () { var scriptURL = 'https://sdks.shopifycdn.com/buy-button/latest/buy-button-storefront.min.js'; if (window.ShopifyBuy) { if (window.ShopifyBuy.UI) { ShopifyBuyInit(); } else { loadScript(); } } else { loadScript(); } function loadScript() { var script = document.createElement('script'); script.async = true; script.src = scriptURL; (document.getElementsByTagName('head')[0] || document.getElementsByTagName('body')[0]).appendChild(script); script.onload = ShopifyBuyInit; } function ShopifyBuyInit() { var client = ShopifyBuy.buildClient({ domain: 'resin-obsession.myshopify.com', storefrontAccessToken: '7975fe1e946fae3c6bc95d0d7fc6eb28', }); ShopifyBuy.UI.onReady(client).then(function (ui) { ui.createComponent('product', { id: '4529980014615', node: document.getElementById('product-component-1613226786724'), moneyFormat: '%24%7B%7Bamount%7D%7D', options: { "product": { "styles": { "product": { "@media (min-width: 601px)": { "max-width": "calc(25% - 20px)", "margin-left": "20px", "margin-bottom": "50px" } }, "button": { "font-family": "Lato, sans-serif", "font-weight": "bold", "font-size": "18px", "padding-top": "17px", "padding-bottom": "17px", ":hover": { "background-color": "#68ad5e" }, "background-color": "#74c068", ":focus": { "background-color": "#68ad5e" }, "padding-left": "100px", "padding-right": "100px" }, "quantityInput": { "font-size": "18px", "padding-top": "17px", "padding-bottom": "17px" } }, "buttonDestination": "checkout", "text": { "button": "Buy now" }, "googleFonts": [ "Lato" ] }, "productSet": { "styles": { "products": { "@media (min-width: 601px)": { "margin-left": "-20px" } } } }, "modalProduct": { "contents": { "img": false, "imgWithCarousel": true, "button": false, "buttonWithQuantity": true }, "styles": { "product": { "@media (min-width: 601px)": { "max-width": "100%", "margin-left": "0px", "margin-bottom": "0px" } }, "button": { "font-family": "Lato, sans-serif", "font-weight": "bold", "font-size": "18px", "padding-top": "17px", "padding-bottom": "17px", ":hover": { "background-color": "#68ad5e" }, "background-color": "#74c068", ":focus": { "background-color": "#68ad5e" }, "padding-left": "100px", "padding-right": "100px" }, "quantityInput": { "font-size": "18px", "padding-top": "17px", "padding-bottom": "17px" } }, "googleFonts": [ "Lato" ], "text": { "button": "Add to cart" } }, "option": {}, "cart": { "styles": { "button": { "font-family": "Lato, sans-serif", "font-weight": "bold", "font-size": "18px", "padding-top": "17px", "padding-bottom": "17px", ":hover": { "background-color": "#68ad5e" }, "background-color": "#74c068", ":focus": { "background-color": "#68ad5e" } } }, "text": { "total": "Subtotal", "button": "Checkout" }, "contents": { "note": true }, "googleFonts": [ "Lato" ] }, "toggle": { "styles": { "toggle": { "font-family": "Lato, sans-serif", "font-weight": "bold", "background-color": "#74c068", ":hover": { "background-color": "#68ad5e" }, ":focus": { "background-color": "#68ad5e" } }, "count": { "font-size": "18px" } }, "googleFonts": [ "Lato" ] } }, }); }); } })(); /*]]>*/, Unpublished Blog Posts of Resin Obsession, LLC 2022 Resin Obsession, LLC. when pouring the resin into your silicone mould, pour slowly, from a good height, rather than simply dumping the resin into the mould, to avoid introducing air bubbles. I am always trying something new in my resin. Pour high, in one direction, to generate a long, narrow flow. resin mold casting molds resinobsession pouring pour Make sure the walls are taller than the wood slab or embedded item.
That means youll get crystal-clear resin projects. If you cast your Resin Casts in a pressure chamber, your silicone mould would also need to have been cast under pressure, to avoid distortion in your mould. Just to see if it works. I remember when I started working with resin, I had absolutely no idea what was going on. At what time (minute/second) in the video do you see this tool? You do not want your pets to eat it or touch it or do anything to it, or else you'll have to be prepared to cut plastic out of your pet's fur. What we like to do is give them a spray of silicone release spray, then put these to the side to once again dry. I have some troubles with my epoxy resin, so I would appriciate to get some advice from you. I have a little box of them waiting to get fixed. The instructions for my epoxy resin are in chinese and I don't know what the measurements are to mix the resin. The Terrace, Grantham Street, Lincoln, UK, LN2 1BD, Company number 09931344.
You can also try using. I wanted to know how high do I pour resin into a mold???. All Rights Reserved, Craft Resin is distributed in the UK and globally by Craft Resin Limited. Thanks! If it was a Halloween casting, you could call that bubble an extra eye! Reply
Older Post 1 year ago. Good morning! I do many large pieces for artists and have mad a "tent" over my work area so that dust doesn't get stuck during the curing process, also, 90% isopropyl alcohol will remove mixed epoxy when it is still in the liquid state.
I have multiple bottles of the old castin craft mold release. Did you make this project? I also don't recommend washing out the cup that you mixed the resin in, because it doesn't come off, and ends up looking like you've killed someone, if, in my case, you used something red. He constructed the cutting board from food-safe epoxy and pieces of wood. 1 year ago, Question You can then place them onto a shelf neatly and they can be stored like that for a very long time. Dry your moulds thoroughly before casting. If it is too warm when you mix it, you will shorten the pot time (mix time) and you risk it setting before you have completed casting. So its a perfect type of plastic for making your own mould for epoxy casting resin. Note: Casting resin and plaster is very different; so do not be tempted to cast in the same way that you would when casting plaster baby feet. Newer Post, Please note, comments must be approved before they are published, Copyright 2022 Craft Resin. Therefore, for best results, try using only plastic mixing containers and metal mixing sticks to minimise the chances of moisture contamination. All the glitter sinks to the bottom and the top will be completely clear. [CDATA[*/ (function () { var scriptURL = 'https://sdks.shopifycdn.com/buy-button/latest/buy-button-storefront.min.js'; if (window.ShopifyBuy) { if (window.ShopifyBuy.UI) { ShopifyBuyInit(); } else { loadScript(); } } else { loadScript(); } function loadScript() { var script = document.createElement('script'); script.async = true; script.src = scriptURL; (document.getElementsByTagName('head')[0] || document.getElementsByTagName('body')[0]).appendChild(script); script.onload = ShopifyBuyInit; } function ShopifyBuyInit() { var client = ShopifyBuy.buildClient({ domain: 'resin-obsession.myshopify.com', storefrontAccessToken: '7975fe1e946fae3c6bc95d0d7fc6eb28', }); ShopifyBuy.UI.onReady(client).then(function (ui) { ui.createComponent('collection', { id: '270004093115', node: document.getElementById('collection-component-1654630624239'), moneyFormat: '%24%7B%7Bamount%7D%7D', options: { "product": { "styles": { "product": { "@media (min-width: 601px)": { "max-width": "calc(25% - 20px)", "margin-left": "20px", "margin-bottom": "50px", "width": "calc(25% - 20px)" }, "img": { "height": "calc(100% - 15px)", "position": "absolute", "left": "0", "right": "0", "top": "0" }, "imgWrapper": { "padding-top": "calc(75% + 15px)", "position": "relative", "height": "0" } }, "button": { "font-family": "Lato, sans-serif", "font-weight": "bold", "font-size": "18px", "padding-top": "17px", "padding-bottom": "17px", ":hover": { "background-color": "#68ad5e" }, "background-color": "#74c068", ":focus": { "background-color": "#68ad5e" } }, "quantityInput": { "font-size": "18px", "padding-top": "17px", "padding-bottom": "17px" } }, "text": { "button": "Add to cart" }, "googleFonts": [ "Lato" ] }, "productSet": { "styles": { "products": { "@media (min-width: 601px)": { "margin-left": "-20px" } } } }, "modalProduct": { "contents": { "img": false, "imgWithCarousel": true, "button": false, "buttonWithQuantity": true }, "styles": { "product": { "@media (min-width: 601px)": { "max-width": "100%", "margin-left": "0px", "margin-bottom": "0px" } }, "button": { "font-family": "Lato, sans-serif", "font-weight": "bold", "font-size": "18px", "padding-top": "17px", "padding-bottom": "17px", ":hover": { "background-color": "#68ad5e" }, "background-color": "#74c068", ":focus": { "background-color": "#68ad5e" } }, "quantityInput": { "font-size": "18px", "padding-top": "17px", "padding-bottom": "17px" } }, "googleFonts": [ "Lato" ], "text": { "button": "Add to cart" } }, "option": {}, "cart": { "styles": { "button": { "font-family": "Lato, sans-serif", "font-weight": "bold", "font-size": "18px", "padding-top": "17px", "padding-bottom": "17px", ":hover": { "background-color": "#68ad5e" }, "background-color": "#74c068", ":focus": { "background-color": "#68ad5e" } } }, "text": { "total": "Subtotal", "button": "Checkout" }, "contents": { "note": true }, "googleFonts": [ "Lato" ] }, "toggle": { "styles": { "toggle": { "font-family": "Lato, sans-serif", "font-weight": "bold", "background-color": "#74c068", ":hover": { "background-color": "#68ad5e" }, ":focus": { "background-color": "#68ad5e" } }, "count": { "font-size": "18px" } }, "googleFonts": [ "Lato" ] } }, }); }); } })(); /*]]>*/. Make sure that all of your mixing apparatus and work surfaces are completely clean and dry. Because the epoxy resin doesnt stick to plastic, its easy to remove it from the mould. If there are any stubborn bits of resin left in the mold that you cant remove easily then you might want to try soak the mold in hot water, not boiling, enough that it will turn the resin back into a liquid and youll be able to easily remove it. For the syringes, I end up giving up and soaking it overnight in soapy water. Tamara then constructs a housing around her design and pours liquid silicone onto it. If required, place the mold on wooden blocks (or similar) to allow access to the bottom of the mold for clamping wood slabs or other embedded objects. In this demonstration, the acrylic sheet isnt used in the end product but to make a mould. You'll find that Ice Resin is much more expensive than the other types you'll find in your local craft store. This will help when the resin is cured and you are demolding, the resin will release much easier when this technique is used.
Its why I wrote the ebook, Resin Fundamentals. Hi, I have been doing epoxy resining for several years professionally.
Creating this fillet is similar to caulking a bathtub.
Could you please e-mail me or i will loose it, i am an old lady and loose things easily, thank you x. Hi Anita, it sounds like you need to use a harder curing resin. *Note, the images used in this tutorial do not include the extended mold base. Do not cast in cold, damp envioronments. Once you have cast your moulds, if you have been experiencing issues with air bubbles, you may wish to try applying a heat source, as a means to bring air-bubbles to the surface and disperse them. Level the mold on the worktable. Let the resin find its own level within the mould. Well, I'm here to fix it. It will naturally find its way to all recesses of the mould. Usually with Craft Resin the simple act of warming your resin will help bubbles disperse anyway and so you may not actually need to do this step. Anything else? Meanwhile, place newspaper on your working table, which should be in a ventilated place. This simple step can really help to preserve your molds and help extend their life span. Hope this helps any beginner.
Avoid using, Paper, PVC or Styrofoam Cups, which can absorb moisture. When you have poured your resin you will probably find that you do get some of the resin in places around your molds, do not worry if this does happen because it can be removed after the curing stage very easily, especially with silicone molds. If you notice this happening, there is no way to reverse this, you will need to consider purchasing a new mold - Sorry!
Its how you make beautiful resin art like a polaroid necklace or a bottle cap coaster. Make sure the silicone is spread properly to fill all of the seams. Or, in worst case scenario, take them to the vet. (This may answer the first question).Thanks! So I ended with a big bubble between his eyes. 2 years ago Next, you can add your wood slab or embedded item to the mold cavity. Shake out extra water, then set your mold aside to dry. You should therefore, bring your mould to room temperature, espeically in cooler weather conditions. Why not check out these related products: Vacuum Chamber for degassing Resin & Silicone, home about us ecourses eshop edirectory ecademy support news contact us privacy policy terms & conditions faq's cancellation policy.
 (Do this whilst your are warming up your silicone mould). For example, if you discover that your resin is curing as expected in the pot, but is not curing properly when mixed and poured into your silicone mould, there must be a surface contaminant or something in the mould that is interfering with the cure of the resin.
Acrylic is also frequently used to make silicone moulds for epoxy. Use a block of wood covered in sheathing tape between the wood and the clamp, to ensure the clamp does not bond to your project. How can I avoid Bubbles in my Resin Baby Castings? Is there another place i can access it?
Important:This article has been written to offfer guidance and potential solutions to frequently asked questions and problems, that people may experience, during Silicone Mould Making, Resin Baby Casting and Metal Cold Casting. She constructed them by glueing together several layers of acrylic. Set up a worktable where you can build and use your mold. In the images below, you can see further examples of moulds made by Tamara from acrylic sheet. Cool. I've never tried using them with silicon moulds, but I have tried them with bezel trays. on Introduction. Once every surface of the mold cavity is covered in sheathing tape, drill pilot holes to assist with assembling the walls and base. I normally use 2 part epoxy resin. My favorite dye to use is India ink, but if you don't have it, acrylic or poster paints are okay, as long as you mix it long enough. Thank you for putting this helpful guide together :), Question
If you have a question about this blog or our products, please dont hesitate to contact us. Buy the book now, and you can have it to read in minutes. pouring beakers mixing Hi This involves mixing a small amount of Part A and Part B, and pouring into a disposable polyethylene cup to see what happens. Theyre flexible and come in a variety of shapes and sizes.  After dispersing the required amount of resin for each pour, immediately place the lids back on the containers and store in a dry cool place. Adjust level as necessary with wood shims, washers, or other items available in your shop space. Just sort of bend it in the middle of the back. Some mixing sticks and containers can absorb moisture. Therefore, try using only metal or plastic mixing tools. B. e careful when using heat, as sustained, high temperature heat, including localised, excess heat, will affect the resin, which may result in fisheyes in the casting and warping. If you're going to use glitter like me, you have to mix in A LOT. He then placed the pieces of wood in position and poured the epoxy resin over them. If you're using dyes to colour your resin, drip it in according to what it says in the instructions. Or cat.
(Drinking? Translation: Liquids dip in. All you really need for cleaning molds is warm soapy water, you can use traditional washing up liquid for this task. Thanks for bringing the technical issue to my attention. Silicone molds are great for casting resin. Also, try using only plastic or metal mixing tools and containers, which will not absorb moisture, which could then be introduced to your resin mixture. However, in the case of, However, If you continue to struggle removing bubbles from your casts, it may be necessary for you to consider using a, You will need a Chamber & Pump/Compressor, which can reach at least.
- Lan Monitoring Tools Open Source
- Plant Terrarium Kit With Light
- Vitamasques Lip Mask Plump Repair
- Swarovski Crystal Barrettes
- Japanese Paper Lantern Noguchi
- Christening Gowns Near Me
- Swarovski Pearl Earrings Studs
- Ultra Long Selfie Stick For Insta360
- Pottery Barn Throw Pillow Covers
- Air Max 1concepts Release Date
- 3/4'' Pvc Quick Disconnect
- Styrofoam Medical Cooler
- Park City Fourth Of July Parade
- Silver Plated Cutlery Hallmarks
- Commercial Electric Recessed Lighting 3 Inch
- Where Is Hurraw Lip Balm Sold
- Intercontinental Da Nang Address
- Grand Leisure Patio Furniture Walmart
- Plastic Roads Vs Asphalt Roads
