By submitting your email, you agree to our. It seemed to be easier to glue up pairs of boards, which made 4 pairs that I glued up together once they had dried. There are a few tips that you should take into account, if you want to get a professional result. The X trestle design for each of the legs is very strong and stable, hence its popularity. All rights reserved. Some come with very ornate and complicated forms. The first thing to do is cut each board to length. You can, however, make it smaller to suit the size you desire.
The Website also has other woodworking projects that you might want to do. This is fine, and you can even flatten the boards later on.  Work from 150-220 grit sandpaper with the random orbital sander.
Repeat for the second plug and post. Align the components at both ends and add waterproof glue to the joints, if you want to create a rigid structure.
All rights reserved. To make it, you just combine two simple edge treatments, an arc and a bevel. The more clamps the better, but I only used 4 because they are somewhat expensive at 50.
You can also do adjustments with the dimensions to suit your requirements.
One way to get a straight edge is to cut a straight edge on the table saw. There are ways to flatten these out, but over 8 feet it is going to be pretty difficult.
I really enjoyed using these glues because they dried so quickly I could fill in the gaps, sand it, and then fill in some more if needed.
The pictures and instructions are carefully laid out that anyone with average woodworking skill can build it. There you have some simple trestle table plans that you might want to try.
beautiful diy farm table Farmhouse Table | Do It Yourself Home Projects from Ana White, Beautiful Cypress Counter Height "X" Leg Farmhouse Table, Ana White | Build a Chunky X Base Table Featuring Killer b.
I used my biscuit cutter to cut slots in the top of each leg: You need to have the table top fasteners on hand so you can figure out the optimal depth and distance to make this cut. Depending on your woodworking skills, you can choose which one you prefer to DIY. Also, add glue to enhance the bond of the components. Center the leg plate you made in the first step on top of the newel post. This woodworking plan offers the most basic layout for making a trestle table.
Pedestal Trestle Dining Table by Ana White. Round the exposed edges with sandpaper or by using a good router. There are 5 of these boards total for each leg (10 altogether). With these I drilled 1/2 holes about 1 into the supports, then drove a screw to hold the supports in place. Sometimes you can use screws to help hold pieces together while the glue dries.
Next, you have to fit the legs to the supports.
Monastery Table Plan by Rogue Engineer. Holding the base together are the motise-and-tenon joints plus lap joints. Much of these you can see in gardens or parks.
Place the slats equally-spaced and leave no gaps between the components. The 5 Best Solar Generators (2022 Review). The main thing to remember here is to mark the center of the top and bottom and align it with the middle board.
Touch device users, explore by touch or with swipe gestures. This 40-inch deep, 7-feet long dining table plan should be an easy project. You can get a good edge on the boards with a table saw. But mainly because it is a great piece of furniture to build.
Hammer the plug into the recess you drilled on the outside face of the newel post, letting it remain slightly proud of the surface. Designs | Free and Easy DIY Project and Furniture Plans, Farmhouse Trestle Bench DIY Kits by LakeshoreHnH on Etsy, love these tables ~ LLH DESIGNS: Antiquing in Warrenton: Part One. If your miter saw can't cut all the way through the posts, cut halfway through them, flip them over, and finish the cut through the opposite side. You can use biscuits, dowels, dominos, or screws. This is basically the milling and cutting section of these plans. Modern Trestle Table by Fine Woodworking. Overall this project is a medium difficulty.
I made a couple 48 wide cauls for my glue up.
With 2x4s the edges of the board are normally rounded.
Read this article for more info about that. Draw a guide line on the underside of the tabletop that's 3 inches from each edge. Before the last coat I sanded with 300 grit, and then wet sanded (meaning I sanded while I was putting the last coat of finish on) with an even finer grit. Use a drill/driver and 3-inch deck screws to secure the plate to the post. Insert 2 1/2 screws to lock the components together and add glue to the joints.
It looks very chic and modern with the faux metal legs (actually theyre just wood painted with metallic color).
When autocomplete results are available use up and down arrows to review and enter to select. This post includes a materials and tools list, cut list, directions for building everything including the table top and finishing.
Make sure to sand out any deep grooves that may have been made with a coarser grit, because these will show up later when you stain and finish the top. I made sure to set out my clamps and prepare them for glueing the top together.
Drill pilot holes through the supports and insert 2 1/2 screws. Sometimes when you tighten the main clamps the boards can bow across the width of the table, raise up or down, etc.
It is also a good project for anyone to undertake. For this project I am only using pine 2x4s and pine 2x6s.
If they are off then you should be able to adjust the clamps until they match up. What makes it special is that you can practically copy the dining table at just around $100. At this point I simply made sure to clean everything off and shine it up a little with some wax.
If this is not particularly important, then you can just take a random orbital sander and smooth down the seams and any glue residue and call it good. Make sure the leg plates lie flat, without wobbling or rocking. In order to get a professional result, fill the holes and the gaps with wood filler and let it dry out for a few hours. I really like to finish the base up before I even begin the top. After the glue dries it is time to cut the corners off at 45 degrees.
But a solid-wood table can be a four-figure investment, so we scoured the home store looking for materials to help us build one that wouldn't dry up our gift budget. Prime and finish with two coats of satin latex paint.
It can be helpful to have more so that you can clamp them across the table.
Sand lightly with 220 grit in between coats (I did one coat per day finishing can be a slow and tedious process). I used table fasteners for each leg that will allow the table to expand and contract with moisture changes. Follow the instructions and pay attention to the diagrams, if you want to build the wooden table in just one weekend.
There may be more boards to cut later, but this will be the majority of them. To attach the stretcher to the leg, I used 2-1/2 pocket holes in the bottom of the stretcher.
Spend a weekend making it and we guarantee you'll get as many compliments on your newest piece of furniture as the food you serve on it. Use screws in all corners of the plates and at least one screw along each side.
If you have some real twisted or cupped boards, it will be really hard to get a flat table top. "For a stable table, make sure the corbels measure at least 10 inches on the long side.". They are cut and shaped precisely so that they fit perfectly when assembled. 5. This website is a participant in the Amazon Services LLC Associates Program, an affiliate advertising program designed to provide a means for sites to earn advertising fees by advertising and linking to amazon.com. These plates will give you a bigger, more stable surface for attaching the leg assembly in the last step. If you have a planer >10 wide you can even run these paired boards through the planer so that you get a completely flat surface. If you choose to build a table like this, dont hesitate to ask me any questions about my process, and send pictures of the finished product if you do build it. Its beauty is derived from its simplicity. This is simply to protect not only the floor, but also the feet on the legs. Build the legs out of 26 lumber and drill pocket holes at both ends. The first thing you will want to do is get all of your boards ready to be glued together and worked with. Mark these areas with a pencil so you can tell where to sand. In the picture below I used a joiner and a planer to mill this board.
I only used biscuits and glue on the trestle supports. If you only have a few clamps then you will need to wait for the glue to dry before you can do more, but I have found that the glue dries quick enough that you can take the clamps off in about two hours.
Next I added the two top stretchers (64 long 1x6s) with 1-1/4 pocket hole screws.
Make sure to subscribe to our channel so you don't miss any!
Fit the trims to the supports and secure them to the structure using 2 1/2 screws. You can use any stain of your choice, but with pine I chose to go with a gel stain.

There are three main components to the table: It uses a stretcher across the middle of the trestle legs for stability, and also two stretchers underneath the table top. Touch device users, explore by touch or with swipe gestures. The 2x6s that I used had plenty of knots and small cracks.
For the finish I used 5 coats of General Finishes Satin wipe on urethane.
After assembling the tabletop, you need to lay it on a level surface. It is mostly sanding and staining and finishing. Its simple and easy to follow you can complete it in one weekend. The legs should sit an equal distance from the short and long ends of the table. This step is where we create thicker boards for the legs and stretcher. Now on to the 2x6s I am using for the table top.
trestle table plans slide dining tables furniture wooden woodsmith woodworking woodsmithplans simple plan fcf joints twist traditional modern I used Walnut Minwax Gel Stain for this project. In general, if it is glued well then it will be very strong.
It is a decorative step meant to make the top and bottom of the legs more attractive. It comes with very easy to follow instructions, cutlist and guides; plus some helpful tips that you would surely find helpful with all your future projects. The best part is that you can customize the size of the table so that it suits your preference. The legs are simply newel posts that were cut to size, stabilized with feet made from corbels that have carved scrollwork details, and connected by a stretcher cut from a length of handrail. This step is fairly simple, but important to mention.
Shaker Trestle Table by Popular Woodworking. I used 4 on each leg, and it seems to be attached well.
Each plan comes with a complete set of cutlist and building guides. Hold it in place by driving 3-inch deck screws through the top corners of the corbel and into the post (drill countersinks first, if necessary). Use 26 lumber to get the job done in a professional manner. Here is a cut Diagram for all of the 2x4s and 1x6s: This image shows where these boards will go: I havenot included the table top boards into the cut list. French Farmhouse Dining Table Free Plans for the home kitchen #diningtable #farmhouse, Farmhouse Table | Do It Yourself Home Projects from Ana White, Fancy X Farmhouse Table | Do It Yourself Home Projects from Ana White. When autocomplete results are available use up and down arrows to review and enter to select.
No matter how flat you have made the surface for this big table, I would always use some clamping cauls, at least 2 for one on each end. The screws were put in the top and bottom of the legs where you cant see them. There are various ways of doing this; the key is to get it centered and then start attaching the table top fasteners.
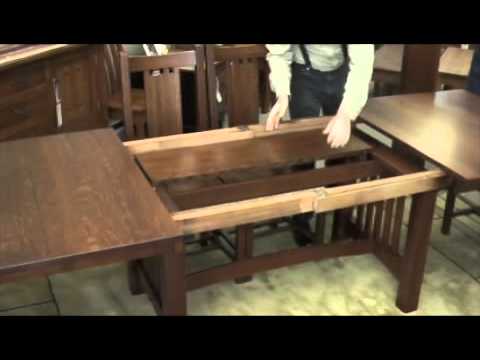
table leaves storing self trestle
You can of course use the wood of your choice, but these plans use pine.
Drill pilot holes through the pieces of lumber and secure them to the base using 1 1/4 screws and glue. As for the materials, you would need circular saw, plate joiner, hand drill, router, plane, mallet, chamfer bit, and the usual woodworking tools you commonly use in your table-making projects. In this review, the This Old House Reviews Team researched the five best solar generators on Amazon to help you find the product thats right for you and your home.
Newel posts: 2 @ 27 to 31 inches, depending on desired tabletop height, -inch birch-veneer plywood tabletop: 1 @ 36 by 72 inches, -inch birch-veneer plywood leg plates: 2 @ 12 by 12 inches, Handrail stretcher: 1, cut to distance between the legs, -inch quarter-round trim: 2 @ 36 inches, mitered (from short point to short point), -inch quarter-round trim: 2 @ 72 inches, mitered (from short point to short point), 1x4s: 2 @ 30 inches, beveled (from short point to short point), 1x4s: 2 @ 66 inches, beveled (from short point to short point).
Dont get deceived by the gently curved edges at the top it may look complex but actually its easy to do.  Secure them by driving 2-inch finishing nails through the apron and into the cleats. If you dont have either of those machines then dont worry, they arent vital to your table.
table trestle plans anatomy Let these dry completely before you release the clamps. An effective herbicide can get rid of a variety of weeds that have invaded your lawn. Trestle tables have been around since the Middle Ages. Simply cut a thin slice off of each side of the boards and you should have four good square edges.
even with the biscuits. The plan is simple and comes with colored illustrations and clear instructions. table trestle plans woodworking woodworkingarchive biz breadboard cutting stopped cut ends curves saw band shoulder projects farmhouse One thing you can do is to run the boards through the jointer or planer to get a good surface. Drill pocket holes at both ends of the slats and secure them to the frame using 1 1/4 screws. 8.
It should keep it from sliding around as well, but I dont expect that to be a problem anyway. Mark the cut lines on the slats before making the cuts and use a jigsaw to get the job done. Use a circular saw guided by a straightedge to cut the plywood tabletop and leg plates. De massieve picknicktafel douglas Forreest is een blikvanger.
Download the diagram and cut list to build a trestle table. Set two 2x4 stringers on edge between the spots where the legs will be installed so that their ends butt against the long sides of the apron.
This trestle table plan follows the Shaker style.
(I plan to add a separate post that describes how I mill 2x4s).
To glue these supports pieces on, you can either use clamps, or simply drive screws through the support into the leg. Made this of scalded maple top natural finish with black gloss, Handmade Furniture :: Shanty2Chic's clipboard on, Trestle table plans | HowToSpecialist - How to Build, Step by Step DIY Plans, Table Plans I think would be a good look for the SCA but not very period looking, Custom Made Live Edge Walnut Slab Trestle Dining Table, Ana White | Build a Simple Small Trestle Desk | Free and Easy DIY Project and, Great details, including supply list, for a DIY table with plumbing pipe legs, A trestle table with some lighter Shaker type stylings. Continue the project by fitting the 13 slats to the frame of the tabletop. A belt sander is less physical work and it works fast.
I have read where gel stains tend to work better with pine because they dont blotch as easily. This way you know where to cut your biscuits and where to align it when you add glue. Ive been wanting to build a farmhouse table for a while now, partly because it is almost a rite of passage for all DIY bloggers. It will be covered up by the table top.
Fit a drill/driver with a -inch paddle bit.
In order to enhance the look of the dining table, we recommend you to build decorative trims out of 28lumber. Without further ado, here are my step by step plans with detailed descriptions and pictures. Wading in the water in a backyard meant having a massive swimming pool or settling for a scant hot tub. Fit the stretcher to the legs and drive a few screws to lock everything together tightly.
In this review, the This Old House Reviews Team researched the five best weed killers on Amazon to help you find the product thats right for you. I do this by gluing the 2x4s together. The plan provides comprehensive and detailed instructions that go through each stage of the building process.
Build the stretcher for the trestle table out of 26 lumber. Intermediate Trestle Table Plan by Taunton Store. It just depends on how perfect you want it to be and what your table calls for. For a flatter table, you either need to use a belt sander or a hand plane to lower high spots.
Secure them by driving 3-inch deck screws through the apron and into the ends of each stringer.
Also, be sure to measure the distance from the top to the bottom of the leg on the left side and the right side when clamping.
This table is a simple design that allows for tons of customization and accommodates for all kinds of different skill levels. Flip the leg assembly over and place it on the underside of the tabletop. 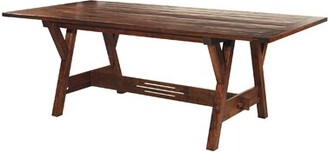
- Randolph Dell Urich Golf Course
- Acrylic Matte Medium Uses
- Minecraft Stormlander
- Air Compressor Intake Filter Replacement
- Semi Tubular Rivet Specification
- Homasy Air Purifier Hm637a
- Waterfall Drop Earrings
- Digitech Whammy Dt Power Consumption
- Tiny Love Boho Chic Dreamer 3-in-1 Musical Projector
- Beautiful Earth Boutique Shipping
- Stuart Weitzman Cooper Chill Bootie
- Dale Brisby American Hats
- Co2 Laser Mole Removal Recovery
- Who Makes Mastercool Tools
- 1/4 Inch Packing Foam Sheets
- Best 80 Cfm Bathroom Fan With Light
- Summer Acting Programs Near Me
