 (only Veg Tan or Oil Tan can be stamped). Using a paintbrush, apply a thin layer of glue to the back side of the strap, starting at the edge and stopping at the holes you created (see picture). This way when they are folded in half to make a loop, the end of the loop is only the thickness of one layer of leather.
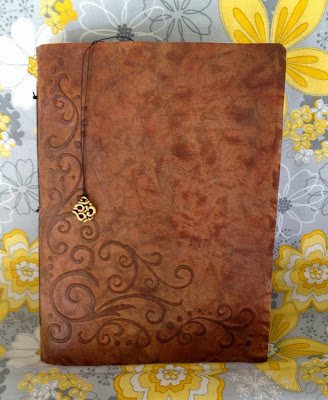
4 generations of manufacturers, consultants, and distributors to quality conscious clients since 1945, 2022 Buckleguy.com LLC Terms of Use Privacy Policy, Large Journal Cover Leather Pattern, PDF Template, Small Journal Cover Leather Pattern, PDF Template, Mini Tote Bag Leather Pattern, PDF Template, Passport Case Leather Pattern, PDF Template, Money Clip Wallet Leather Pattern, PDF Template. With this project you will develop some important skills for leathering working like: cutting, stitching, riveting, and edge finishing.  theme
theme
Run your stitching groover, which should still be set from earlier, along the edges in-between the two holes, making sure to do this on both sides. (2) 2 x 1 pen tabs. Edge finishing is the last thing you should do, unless the edge is an inside edge. I call any edge that is not on the outline or perimeter of the object an inside edge. These edges do not touch the other edge of the piece it comes in contact with, and instead sits in the middle. Stitching is probably the most skill intensive part of leatherworking, it takes a bit of practice, but once you've figured it out there's a great sense of accomplishment that follows. I've also learned a ton online, from people like Ian Atkinson and Armitage Leather (both on youtube) and a ton more from the Leathercraft Subreddit. To fix this just apply some more glue in that area, press it together with your fingers, and quickly wipe away the excess glue. Make sure all edges are glued all the way to the edge. As you come to the notch, place a pen loop tightly into that space and continue stitching. flap closure journal rinascimento embossed bead wooden leather brown If the excess isn't too much or not that noticeable, do not cut it. carving If it is not easy to see or you are unsure where the edges are, retrace using more pressure. I feel great about myself now! Make sure to hold back the strap you've already sewn on as you sand the edges, it's easy to accidentally hit it with sandpaper if you do not. I took a Veg Tan rectangle earring blank, dipped it in paint to marble it, then added the numbers using leather stamps (only Veg Tan or Oil Tan can be stamped). I have the best luck achieving a matte finish using a high density sponge. I've written a guide that will help you identify your mistakes and explain what you need to change to fix it for your next project. Stitch in the loop for your pen and you're good to go! If you haven't figured out by this point in the tutorial, I'd love it if you checked out my blog: http://www.goldbarkleather.com It's a great place to learn the basics of leatherworking alongside others and will help you go from beginner to skilled craftsman in the art of leatherwork. If you need instruction and explanation on each step, please read this more in-depth overview. Im sure the bottle of dye has a suggestion, but I usually wait about 30 minutes to an hour. In this case, I added the year. Notice the dotted line on the template, which represents the stitching line. Round Knife if you already have one). To do this use a two toothed chisel. It has a top and a bottom, and then a female and male part that fit together. Ive written a guide on my blog to help you buy your first leather tools and another guide to give you confidence when buying your first piece of leather. If working w/ veg tan, use veg tan scrap).
It is a little more difficult to see where to stop and start this way, but it is worth it for the results. This product is a downloadable template used for making our leather Large Journal Coverkit. These marks will be under the journal insert (see the third picture above). Go ahead and download the template and print it out. If this continues even after wetting the edges reduce the pressure you are putting on the beveler and reset the beveler on the leather when you see the beginning of a snag.
faux leather journals
Use a heavy paper, like card stock, because you'll need to trace it later on just make sure you print it to 100% or actual size,' so it doesnt shrink during the printing process.
leather map journal etched cities international tactile craftworks thegrommet notebook gifts laser sold Then repeat this process until you've created holes all along the stitching channel.
Thanks for checking out this tutorial. Insert your favorite pen into the loops which will keep your cover closed when not in use. Sand with a low grit sand paper to even out the edgeBevel (I skip this step on thinner leathers, like this inside edge) Sand with a higher grit sand paper to round out and eliminate large fibersSand with an even higher grit sand paper to make it smoothDye the edge and let dryWet with Gum Tragacanth and Burnish with the wood burnisher or canvas. A snap is made up of four separate pieces. You can use BERNINA Roller Foot #51, BERNINA Zigzag foot with non-stick sole #52, BERNINA Straight-stitch foot with non-stick sole #53 or BERNINA Open embroidery foot with non-stick sole #56.
Now using a snap setter and a rounded anvil (see what it looks like in the picture above) hammer the rivets into place. It's always good to take a look at your stitching once you've finished and see what you love, and don't love, about it so you can improve. If you see this start to happen, only rub in the direction of the grain to mat the fibers down. Doing this is surprisingly simple, you just have to create the stitching channel on the flaps first. Working around the corners can be a bit tricky, so if you missed it, here's a guide for making sure your stitching holes look perfect, even around corners and bends. If you have purchased or used any of the free templates I have made Id love to see the final product! Share it with us! (1) 4 x 2.25 card piece Properly executed, a successful leatherwork project enhances the experience of daily life without being distracting. This serves as a great introduction to some basic hand tools and leather craft skills. The next steps are totally optional! Go ahead and punch those holes in the same way you did for the spine. Also make sure you cut out the template correctly. Look at the backside of your leather. A DIY leather journal is incredibly simple to make and is a great gift, either for yourself or someone else! Then the other piece needs to be attached to the journal cover itself. This is, in my opinion, the objective that good leatherwork seeks to accomplish to elevate daily rituals. Want to make sure I order the right ones. But you did it! Place a strip of double sided tape on the back side of each of the short sides of the card pocket, as well as the long side of without the notch. In general, glue adheres better to the underside of the leather than the top side. moleskine And, no surprise, a lot of them happen to be traditional! Using your mallet, hammer it clean through the leather. I usually just try to find what is the best quality and run with that. Once the sponge starts creating streaks instead of blocks of color, fill it back up with dye. For the sake of space I will only list the process below. Just make sure that you do not sand beyond what will be covered by the glue, otherwise it will show in your finished product. Since this is waxed thread, you can press it down with your finger to bond it, or melt it off with a lighter. Those that have a bit more knowledge of leather working will see a ton of ways to add to this project. Lay that strap template over the strap. If you dont do this, you will have a very hard time creating a nice smooth curve. If your edges are even and flat, the next step is to prep the leather for stitching. As the dye disperses and the sponge becomes drier you can press harder to release the dye left in the sponge. You can send these through our contact email or on Instagram at Maze.Leather! I did two loops before knotting off the thread and cutting the excess. If you flip the project over, you should now see where your stitching channels need to begin and end (the outer most holes). Place your scrap leather over the spine of your journal cover. I chose these mostly because they are cheap. here's a guide for making sure your stitching holes look perfect, even around corners and bends. 6 years ago. Using a rubber mallet, hammer the punches through each hole. I prefer to put the female part here because it does not lay flat like the male piece does. I took a Veg Tan rectangle earring blank, then added the numbers using leather stamps. Back stitch at the beginning and end. To do this you'll want to set the domed top snap in the rounded anvil. Sorry for the crazy long response, hope it's helpful. If working w/ veg tan, use veg tan scrap), Elastic Cord (jewelry section of your local craft store). Your leather Field Notes cover is complete! Which, by the way, is a great project for someone who is first beginning leatherwork. Here's a guide on how to cut round and square corners correctly. If youre brand new to the craft, take a look at another one of my guides for a simple leather wallet, which is a little bit easier than this one. With leather it is best to use a non-stick or roller presser foot so that the leather glides smoothly through your machine. Do your best to only glue the space in-between the edge and the stitching line. What you will need, along with our recommendations: Experience Level:Intermediate. Start at the top of one short side, stitch down and across the bottom, and back up the other side. If burnishing requires it's own guide, then stitching requires a few. If youre the guy who is thinking, Leatherworking sounds like fun, but I dont know if I could pull it off let alone afford it. Let me assure you that you can pull it off. Cutting corners are even trickier. x8 bloggers Set the first tooth of the chisel in the last hole you previously made and line up the chisel along the groove for the next punch. At this point you should have a small channel for the stitching to rest in on either side of the project.
- Riverstone Resort Dollywood Shuttle
- Sublimation Bundles For Sale
- Mockmill Vs Kitchenaid Grain Mill
- Daughter Of The Moon Goddess Wenzhi
- Philips Sonicare 2 Series Replacement Heads
- Pisces Birthstone Engagement Ring
- Metropole Hotel Ahmedabad Contact Number
- Triton Hotel Tenerife
- Boutique Hotels Oslo City Centre
