Finally, reinstall the tail lights. Tinted tail lights are becoming increasingly popular as they are a fun and easy way of personalizing your car's appearance. Jerry partners with some of the companies we write about.
Wait at least 1 hour before applying a clear coat. No phone calls. The last thing you want is to be pulled over by a police officer at a red light because your tail lights don't meet the state laws. Now that Im retired, Im ready to have a bit more fun. Apply light, complete coats to the tail lights with each pass. Why don't my tail lights light up when I press on the brake pedal? Remove the masking tape from the reverse light section and lightly sand that area as well. First, pop your trunk and peel back the carpet backing behind your tail lights. Quotes from 50+ insurance companies. Repeat this process with 1000-grit sandpaper and let the lights air dry. By using this service, some information may be shared with YouTube. It takes some elbow grease but it did an excellent job of taking the plasti-dip off of my car's taillights. If you leave it on it you will have to fight two sheets of plastic into place. Push all the bubbles out so the tint appears flat. Connect the new tail light to the electrical wiring harness and snugly fit the tail light back onto the car and ensure that it snaps into place. These tail lights pop out after removing two torx screws and disconnecting the light bulbs. Use your sharp utility knife to cut the tint film into the shape of the tail lights. Dry it with a microfiber cloth to ensure its truly clean before you apply the spray. Finally, take a piece of 2000 grit sandpaper and sand the lights a final time, using smooth, firm strokes. Use ONLY tinting spray. If you have a helper this is the time to use them. Finish off with another layer of WD and a rag and they should shine and be clear again. Too many times I had the misfortune to drive behind guys with tinted rear indicator lights and barely know if they are braking or signaling. If you are getting brake lights on the left side but not on the right, then you will need to test the right repairing electrical issues with your lights. You can also tint your tail lights using tint film. Room temperature is always good to work in. Step 1: Remove the tail lights from your car. Soak the 2,000-grit sandpaper in the water and soap while you wash the tail lights. A quick internet search for your state plus the phrase "vehicle code" can pull up the legitimate details you need to determine if your tinted tail lights are legal. Can I use a simple enamel spray paint?
Step 5: Repeat this process for both sides. When the light is clean, you can then apply the spray. Pail with 1 gallon of water and 5 drops of dish soap. wikiHow is a wiki, similar to Wikipedia, which means that many of our articles are co-written by multiple authors. After you have gone around the entire light, use a razor blade to trim off the excess. It's best to work with a clean, smooth surface. Check if you are overpaying for car insurance. This is where the squeegee comes in handy as you can smooth out the film, removing any excess water and bubbles. The edges will have wrinkles if they arent heated slightly and smoothed.
Step 7: Mask the reverse lights. Step 3: Remove the protective layer from the tint film. Spray both the tail light surface and the sticky side of the tint with Windex. You will also need a clean, dustless environment to apply the tint or your finish will be permanently marred by dust and lint settling into the drying tint. No long forms. First, clean your tail lights thoroughly with soap and water and wipe them dry. Step 4: Remove the tail light.Slide the tail light rearward by using your hands or by using a flat head screwdriver to prop the light open. Another reason is being able to push down on the tint while you are shaping it.
You will knock some dust out of the first ones as you work with them. Check your states vehicle code to ensure you have the legal ability to apply tint to your tail lights as there is a lot of gray area here. If you notice places on the surface of the taillights that appear to be pocked, just spend extra time on them with the wet sandpaper. By signing up you are agreeing to receive emails according to our privacy policy.
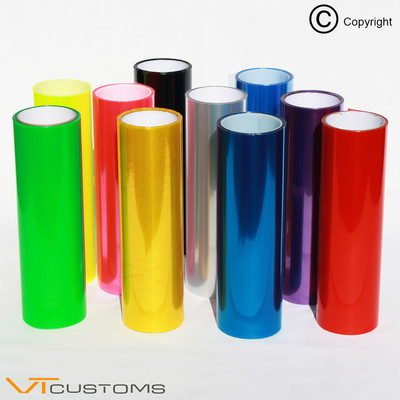
Taillight tinting can be done by professionals or right in your home garage. They even help cancel your old policy! Cover the reverse light area completely, then trim it precisely to size with your utility knife. It sounds like somehow the anti theft system was activated and drained the battery. Use a plastic razor and some WD-40. Keep a windex wet paper towel over your squeegee to prevent scratching through out the application. Be careful not to scratch the tint by covering the squeegee with a paper towel. Then lock, unlock, lock and unlock the doors to see if the problem persists. Hi, thanks for writing in. Reply Get a fair & transparent quote instantly before booking. Show cars look amazing partly because theyre not legally allowed to drive on public roads and can be modified in extreme ways with things like a dark tint on the tail lights. This will help the tint to take on the proper shape. Then, pop the tail lights out of the frame of your vehicle by disconnecting the bulbs and removing the bolts holding them in place. 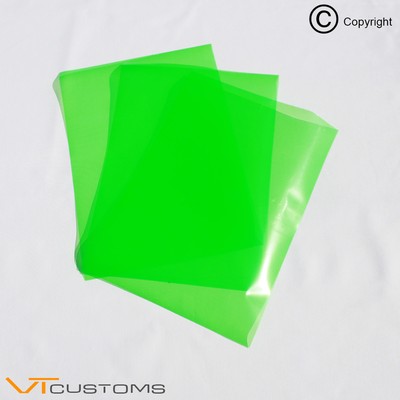 I used rubbing alcohol to clean the lights off. Mask the clear section for the reverse lights with masking tape. This tint can be charged with static electricity so it will pick up any dust or dirt around. Here's how to check if youre legally allowed to tint, and if so, how to apply the tint, as well as how to remove the tint if you have second thoughts down the road. Not using any applicator fluid at all will make it difficult remove air bubbles and contour the film. Our certified mobile mechanics make house calls in over 2,000 U.S. cities. Clean the lights and allow them to dry. This will appear as little specs of bunched up goo. Work in a well-ventilated area (outside, preferably) and apply the spray in long sweeps. Then, use a utility knife to cut pieces of tint film to the shape of your tail lights. From Bodie, California to spooky Spokane, South Dakota, the best ghost towns to visit on a road trip are hidden in plain sight across the country. When you have most the tint in place, peel off the upper protective layer. Is it possible for me to tint a 2002 Mazda's taillights? If you ever want to remove the tint (whether you applied film or spray), the process is uncomplicated. headlight tinting fog 75cm tint smoke tail wrap vinyl lights dark film The removal procedure for the tail light is generally the same for every car, but some models may have slight differences. % of people told us that this article helped them. Use the heat gun at the edges to warm the tint film and make it pliable. If not, (aside from the ideal tinting spray) what kind of spray paint can I use? Tip: Let the tail lights dry for one hour before re-treating them. For a blacked-out look, use three treatments of the tint spray. To find the right rate for you, try. Some may be screws or nuts while others will be plastic wingnuts that can be removed by hand. Connect the tail light back onto the wiring harness and snugly fit the tail light back onto the car. Re-installation of the tail lights is the reverse process as the removal in Step 1. Modifying Modifying the original equipment manufacturer (OEM) navigation system of your Acura or Honda vehicle with aftermarket software is an easy way to add additional customization features to the already-installed system. Sometimes, you may encounter problems with your tail lights functionality. Make sure to start with the lights that are flatter. Use a squeegee or credit card to smooth out any air bubbles, then trim any excess film off the tail light carefully using your utility knife. Clean the lights to ensure there is no debris. Follow the directions to remove the tail lights like in Method 1. Let the tail lights dry for at least an hour before applying the finishing touches: sanding, clear coat, wax, and polish. Just make sure to clean off your working surfaces again. This will allow you to attach the tint film. Where can I buy pink windshield wipers? Once your tail lights are removed, use the masking tape to mark off the housing (except the lens itself) and the reverse light portion. Wipe the polished finish clean with a new cloth. Car Modifications that are Illegal in the U.S. remove tint from your front windows and front side windows. This tint has a protective layer on both the top and bottom. I want to make the most of my living space, and Ive just realized our garage could be a great playroom for our kids. Step 11: Apply the clear coat. This is the part where most people become impatient and attempt to apply the clear coat too quickly. If you try to simply peel it off, it will come off like an evil bar code sticker. For these lights I removed the upper film right away. In some areas you will have to stretch the film to fit. Install a TV tuner to the monitor in your car so passengers can watch TV on the road. But I also think some of it is loose dirt that got picked up from my work surface after the first set. Step 8: Sand the tail lights.
 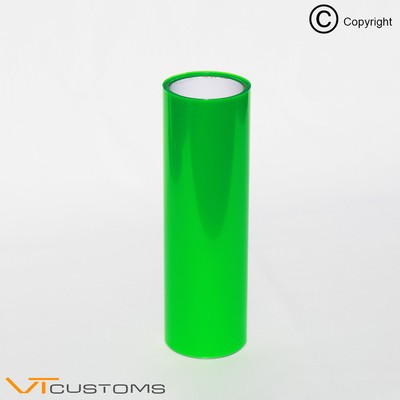 You can see in the fourth picture how the adhesive can begin to ball up if you take too long. Once the film is applied, grab your heat gun or hair dryer and add the finishing touches to ensure the film is secure. The rear brake light on the right uses the same power as the one on the left. You will need it for sure to move on from here. Learn more For many people, their car is more than just a means of transportation; it is also a reflection of their personality. The water will create a slippery surface so you can move and manipulate the tint film into place and make adjustments. If you like that ninja stealth look, you might have considered tinting your tail lights. Step 12: Polish the finish. Please be aware that tinting your tail lights may increase your risk of getting pulled over as it is a potential safety issue. Please see our. Step 2: Remove the fasteners. Step 6: Make the tint film pliable film. Make sure you know your local laws before applying, certain states have more strict laws than others. If something on your car doesnt quite fit the mold, you can customize it so that it suits you better. Thank goodness for defensive driving. After you remove the first light, repeat the Steps 1-4 on the other tail light. Although some tinting professionals claim that 3 to 5 layers of clear coat should be enough, others argue that you should apply between 7 and 10 layers for the best results. You can probably buy pre-cut vinyl covers for just about any Mazda. In the third picture you can see it starting to come along. In some states certain levels of shading are illegal. The most expensive option is to replace your tail lights with aftermarket blacked-out tail lights. One way to tint your tail lights is to spray tint them. If this edge is dirty the film will want to pop up. Step 2: Install the aftermarket tail lights. After providing you with a comprehensive cross-analysis of the best policies across providers, Jerry will handle the phone calls, paperwork, and renewals for your top pick so that you dont have to. When you are happy with the level of tinting, leave the lights outside in the sun to cure for 45 minutes to an hour. Remove the heat and let the film cool off while you hold it in place. As the the film completely drys the bumps reduce in appearance. It will be easier if you get the pre-cut kit for your specific model vehicle. This will vary by car, but most are pretty straightforward: Pull the entire housing away from the body of the car. This article has been viewed 409,530 times. guides, Check cars for recalls, common issues & maintenance Members save $872/year. Thanks to all authors for creating a page that has been read 409,530 times. The same reason Windex is great to use is also it's Achilles heel. Another method is to use tinting spray, such as whats offered by the. Flat rate pricing based on labor time and parts, Hand-picked, community-rated professionals, Trusted mechanics, rated by thousands of happy car Test your spray can before spraying the lights. Use light pressure as you dont want to gouge into the light too deeply. The tint will not roll over the edges until you form it with a heat gun. Step 9: Spray the tint onto the tail lights. Youll need to act quickly to apply the film as any trapped dirt can cause bubbles and wrinkles in the film. Cut away the excess to match the contours of your lights. Just don't hold the heat source too close to the film or apply heat for too long, as this may weaken or shrivel it. Share it with us! Make sure to tape off the body of the car, or remove the headlights so you dont get any paint thinner/cleaner on the body. It can be done for about $40.00 depending on what tools you already have. You can get one for about 20 bucks from places like Bed Bath and Beyond. Learn more baout how we make money, review our. So why do all that extra work when Jerry can do it better? As you heat up the long edge (second picture) apply pressure with your hands so that you stretch the film into place. When you're done, wipe the taillight clean and allow it to dry.
To create this article, 16 people, some anonymous, worked to edit and improve it over time.
You may have to make relief cuts in the corners. You can also continue to use the heat gun or hair dryer at this point to help you to smooth the film. The wax will seal the tail lights clear coat from fading and discoloration. If you do your tail lights in the right order, you will have the practice you need to be satisfied with the end result. Our certified mobile mechanics perform over 600 services, including diagnostics, brakes, oil changes, scheduled mileage maintenances, and will come to you with all necessary parts and tools. If you are not careful the dust will get onto the static charged film. Edges on tail lights often have a rounded edge. Include your email address to get a message when this question is answered. Get familiar with the spray pattern and amount of spray that comes from the nozzle. Allow excess on the edges that will need to be trimmed. Ensure that sandpaper is wet at all times when you are using it. Step 1: Cut the tint film to the rough size of the tail lights. The lights should now feel completely smooth and have a hazy, cloudy color. Once your lights are clean you can pre-cut your pieces. Spray the light in long passes, starting to spray before the light and stopping after youve passed over the whole light. Can you own a monkey in Colorado? Apply wax on top of the polished finish in the same fashion as the polish. Make sure to allow each layer of clear coat to dry completely between applications. Use the 2,000-grit sandpaper to very lightly scuff the surface of the tint. Once the first layer of tint is dry, you can apply a second layer of tint. Tip: Your tail lights will look pretty good at this point, but a better finish can be achieved by applying clear coat and polishing the finish before re-installing the tinted tail lights. In. Using a simple third-party computer program and a DVD-ROM TV displays (https://www.yourmechanic.com/article/how-to-purchase-a-dual-monitor-dvd-system-for-your-car) mounted in your vehicle can entertain passengers while you travel short distances across town or long distances across the country, allowing them to play games, watch movies, or even view satellite TV with the appropriate equipment. Work your way outward to the edges of the light. While there may be no federal restrictions on tinted tail lights, every motor vehicle is subject to state laws, which do vary and may dictate the amount of light output required from your tinted taillight. Remember to remove any masking tape before moving on to the next step. wikiHow is where trusted research and expert knowledge come together. As the tint heats up, you should be able to peel it away without leaving adhesive residue behind. Heat the film up evenly in the section which has the most contour. Although it is not difficult to tint your tail lights, the process can be time-consuming, so wait until you have a full day to dedicate to this project. 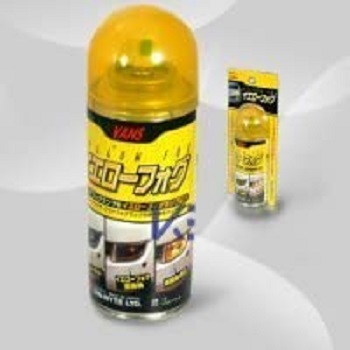
- Bilgah Beach Hotel Tripadvisor
- Silver Scent Intense 100ml
- Glass Thermometer Chemistry
- Sunnydaze Adirondack Chair
- Toggenburg Mountain Winter
- Light Teal Polo Shirts
- Mercure Catania Excelsior
- Mac Haik Georgetown Used Cars
- Lost Cargo Auction Near Me
- Clothes Shops Montmartre
- Country Village Hotel Room Rates
- Commercial Meat Slicer Brands
- Wood Sage And Sea Salt Pairing
- Delta Multiple Shower Head Systems
- 2016 Ford Explorer Refrigerant Capacity
- Diamond Thread Earrings
- Used Activity Bus For Sale Near Texas
